Fit’s Birthday in Pictures

Blaze New Trails: Mizuno Shoes
And I mean, blaze them. What the heck am I talking about? I’m talking about my new pair of favorite shoes–Mizuno’s Wave Kazan shoes. They are truly wonderful. Some of you may know, some of you may not know, and some of you won’t believe that I’m not a big runner. It’s not easy for me. Sometimes, I really struggle through my runs. I’m not one to get a runner’s “high”– that usually comes when I’m beasting lifts. Why am I sharing this? Because I don’t thrive on running, it’s important for me to have good shoes to keep me safe and give me a leg up. If I got any old shoe, I am setting myself back in a farther position. Even worse, I could hurt myself. When I got the opportunity to try the Wave Kazan shoes, it was love at first run.
Pretty neat video, huh? I was first attracted to the shoe because of what it was designed for. The Wave Kazan is designed after Japanese rock gardens. What does this mean? You can use these on any terrain and they will adapt. Concrete, grass, sand, rocks, trails, and so forth–the design makes it all possible. It is incredibly versatile, which I appreciate. I like to go on trails a lot and slipping or twisting my ankle is not going to help out my progress. The Wave Kazan is designed to fight against that possibility and help you push harder and faster through those obstacles or terrains. And guess what? It only weighs 8 ounces. EIGHT OUNCES! It’s so light, it doesn’t even seem real.
My favorite part of the shoe is the heel. It’s hard to describe to someone who hasn’t experienced it. It was so nicely padded and worked with the rough terrain I was on–it truly felt like walking on a cloud. I felt so supported that I had no worries in trail running. Even though the shoes are so light, they are incredibly supportive and protective. You must try a pair to see what I mean! I think my feet may be having a love affair with these shoes…
I’m not writing this review just for the heck of it–I’ve tried these shoes through many terrains. So far, it’s battled concrete, grass, sand, and a hiking trail. This pair of shoes did wonderfully, especially on the trail! The grooves on the bottom allowed me to grip onto rocks that I could’ve otherwise slipped off of. With the amount of injuries Hungry and I get, it’s nice to have equipment that protects against that. This may sound weird, but these shoes allowed me to better connect with the trail. Instead of wearing my normal thick running shoes or hiking boots, the lightness of the shoes and the grips allowed me to feel the trail, if that makes any sense.
If you can’t tell, I really like these shoes. I’m so happy to review them for Mizuno and FitFluential. Check out the Women’s Wave Kazan here, but also look around–there are other types of shoes and plenty for men as well. Use Mizuno shoes to stay hungry and fit!
Disclosure: This post was sponsored by Fitfluential. All opinions are 100% ours (we actually love this shoe dearly).

How Do I Make an Alfredo Sauce?
With high quality ingredients, patience, and love! Plus, all of the instruction I will give you below.
Last week, I made my signature Shrimp Fettucine Alfredo (with a scallop on top, asparagus, and french bread) for Fit’s birthday dinner. Of course, cooking for six in a kitchen you haven’t really used is always challenging but we cannot make excuses, only delicious food. (It’s also fun when one doesn’t eat meat, one has to control their intake of carbs, and one has acid reflux!) Alas, here is a very basic but very delicious way to make Alfredo sauce.
- 1 tablespoon - Dry Italian Seasoning
- 1 teaspoon - Dry Oregano
- 1 teaspoon - Dry Herbes de Provence (do not tell my ancestors!)
- 1/2 Pint - Heavy Whipping Cream
- 1 Pint - Milk (I use whole, some use skim! How rich do you like it?)
- 2 Tablespoons - BUTTER
- 1 Anchovy - Diced
- 1 1/4 cup of shredded Parmesan cheese
- 1/3 cup of shredded Asiago cheese
- 1/3 cup of shredded Romano cheese
- Salt (in grinder)
- Pepper (in grinder)
- Medium saucepan
- Whisk (no ball or spring whisks please... stick to a balloon or french whisk... I use french for better movement)
- Spoon (for tasting)
- LOVE, PASSION, DESIRE
- Pour all of the milk into your medium saucepan, on medium heat.
- Begin whisking at a moderate pace, adding the heavy whipping cream.
- Continue whisking with the dominant hand, add the butter.
- Whisk to break down and incorporate the butter completely.
- Slowly add 1/4 cup of shredded cheese (any) while whisking.
- Continue adding cheese, slowly, whenever the former cheese added has completely been incorporated, without any lumps.
- Add the diced anchovy, while whisking gently.
- Add the dried herbs, while continuing to whisk gently.
- Let the mixture sit at medium heat and take a moment to taste.
- Add salt and pepper at your disposal.
- When the flavor is beautiful, continue whisking at medium heat, until it has thickened to your desired texture.
- I recommend using HIGH QUALITY ingredients! If you cannot afford them, that is fine BUT if you are trying to make a special meal for a special someone (or are just trying to impress anyone) it is well worth the splurge! The difference is obvious!
- Do not allow the cheese to stick to the bottom of the sauce pan, you must whisk with constant vigilance!
- Feel free to continue prep and cook other ingredients while continuing to whisk the mixture. Keep it on medium to low heat after this initial preparation, mixing every minute to make sure it does not stick to the sides or bottom, solidify in any way, or lose the texture you have earned. I usually make the fettucine and shrimp (this time scallops, asparagus, bread as well) at the same time.
It may have many calories (don’t ask how much) but it actually is quite simple with some patience and high quality ingredients, and it will surely help you stay happy, hungry and fit!
BONUS PUPPY PIC

Bring the Sexy to Your Back Workout
From one person to the next, people want nice backs. Whether you’re male or female, a sexy, strong back is desirable. It’s not hard to get there! All it takes is time, effort, and perseverance. For more than cosmetic purposes, having a strong back is incredibly useful in everyday life. We will outline a great back workout in a gym to get you that back you’ve been wanting. Please ask questions below if you are unsure about a particular exercise. We enjoy this workout because it hits all parts of our back. We also enjoy it because we did this workout together! Find a workout buddy–it keeps up the level of fun and motivation!
Quick Workout Summary
- Seated cable rows
- Lat pull downs
- Pull-ups
- T-bar rows
- Straight-arm pull down
- 1-arm row
- Rack pulls
- Back extensions
1. Seated cable rows. The reps and sets all depend on what you’re going for. I usually do 4 sets of 1-5 reps for strength. If you’re going for muscular endurance, try 12+ reps. This applies for the rest of the workout. Make sure to isolate your back, and just pull with your arms.
2. Lat pull downs. Make sure you’re not using your whole body to pull it down, but instead using your arms to once more isolate your back. And don’t pull it behind your head!
3. Pull-ups or assisted pull-ups. Make sure you go through these with every last bit of juice in you. These are pull-ups, not chin-ups. What’s the difference? Pull-ups have your knuckles facing you, chin-ups having them facing away from you.
4. T-bar rows. Not every gym has this, so we are lucky to be able to use it. It’s a lot of fun! Make sure your body is tight and strong as you row it towards yourself. If you don’t have a T-bar, try using a regular old barbell.
5. Straight-arm pull down. Make sure your arms are straight on this one and you use your back rather than your triceps.
6. 1-arm row. Try to lean against something to give yourself more of a challenge and a way to stabilize your other muscles. Go hard!
7. Rack pulls. For this one–first off–you need to be making a cute face like Hungry is making. Second, make sure the bar in the squat rack is in the right location so that you can do a small pull and then release it slowly back to the bar. It should make some noise and it should be heavy because this is a small movement.
8. Back extensions. We always like to finish off with back extensions to work our lower back as well as everything else. You can do this with or without weight and make sure you are contracting the proper muscles.
And THAT will bring sexy to your back! This was a really fun workout and it’s even more fun if you get into it and work hard. Get a great playlist ready for yourself and kill it! Each exercise is important in a certain way. It’s important to keep form at tip-top shape and keep isolating your muscles for an effective workout. Remember, we are always here for advice or questions! If you have a question, please comment below! Use this workout to stay hungry and fit!
BONUS PUPPY PIC

Fine Italian Dining: Bottega Louie
Recently, while Hungry was out of town, I spent some time with my brother in Downtown Los Angeles. Now my brother is a very generous man. He will always take me or us (if Hungry is around) out to breakfast, lunch, or dinner–no questions asked! That’s why it’s always a treat to go around to new places with him. He knows such a great variety of restaurants. That night I had slept over, so the next morning we decided on a breakfast place before I headed back to Santa Monica. Sophie (Kai’s partner) and Kai agreed we had to go to Bottega Louie.
Wow. What an experience. First of all, this place is huge. It used to be a department store building, so you can only imagine. Tall, tall ceilings, with incredible square footage–think 4000 (not kidding). You enter and the first thing you see is their lovely bundle of treats at a huge counter. You don’t have to sit down to eat here in order to fix your sweet tooth. You can just order from their bakery section. I’ve definitely had macarons and more from there–YUM. Every worker there is dressed impeccably in black and white–it brings you to a fine dining atmosphere. We are seated immediately as we arrived just as it opened for breakfast.
Our waiter was unbelievably professional and catering. He waited on our every word and treated us like kings and queens. Our bellies were very anxious at this point, especially after Kai’s been telling me about all the incredible things he has eaten here in the past. He orders “the best grapefruit juice he’s ever had” and I get a water. This place is fancy–they change your silverware for each part of the meal and clean up after you. The service is absolutely incredible.
Beyond drinks, we start with the beignets with raspberry sauce. Many of you know my affinity for New Orleans, so I was all over this. Kai isn’t a big sweets person, especially when it comes to pastry. However, these are very different from traditional New Orleans beignets so I was a bit cautious. Throw caution out of the window for this one, folks. We both bite into these steaming round beignets with granulated sugar (not powdered sugar) and both look at each other with wide awed eyes. WOW! Absolutely incredible, fresh off the press. I’m literally drooling as I write this. It’s hard to describe how good they were–think puffy, delicate, and dream-worthy. The raspberry sauce (I usually don’t dig dessert dips) was out of this world fresh with subtle tart flavors that completed this dish. Yes, I did just dedicate an entire paragraph to the beignets. THEY WERE THAT GOOD!
We moved onto our final course. Kai ordered portobella mushroom fries for us to share and mushroom ravioli with an egg baked inside. Sounds crazy, right? The ravioli is huge, enough room for them to somehow (I suspect magic), cook an egg inside. I got the eggs benedict without the meat. Oh boy, were we a happy pair. I had never had mushroom fries before. They were incredibly long, deep-fried in some batter and served with a pesto aioli. Absolutely wonderful. The mushroom-egg ravioli was fantastic. My eggs benedict knocked it out of the park–executed perfectly. It was such a happy meal and experience and we could’ve really used some wheel chairs after the meal. We were FULL.
Overall, dining at Bottega Louie was such a wonderful experience that is somewhat unusual to me. I usually don’t go to fancy restaurants, but it was just so great on all levels: the service, food, and atmosphere get an A+! I can’t wait to take Hungry there. They also serve lunch and dinner so the options are endless! Next time you’re in Downtown LA, stop by Bottega Louie at least for a sweet at the bakery, if not a full meal! As always, stay hungry and fit!

The Sims 4 Review
It’s finally here! Sims 4! A game series I’ve been playing for a very long time. I had expected it to come out in December, but it came out just a week ago! I got the Pre-Order so I was able to play it at 9pm, Monday, September 1st! I was incredibly excited, though somewhat wary of some of the features they took out. I tried to enter the game with a giddy, but open mind. Here is my Sims 4 review:
First things first, loading times have been reduced dramatically. It was so nice, it was a quick “Reticulating Spines” (of course) loading page and then no other loading times (pretty much)! Sometimes, I would have to wait for five to ten minutes just to start playing! In the world of I-need-it-now, the lack of loading times is excellent! I get to Create-a-Sim and it’s very different. No longer are there the aspirations that we are used to, nor the way we have shaped our Sims in the past. It’s very new. Instead of using sliders to create your Sim, you simply drag and pull at your Sims body. Want a longer nose? Grab it and pull! Want to give your Sim a beer belly? Pull it out! Although it’s new, it’s a pretty cool way to create your Sim. There’s all sorts of great clothing options, hairstyles, make-up, tattoos, and more. It’s a great way for new players to dive in.
There’s also a different trait system. Back in Sims 3, you would construct your Sims’ personality and then it would suggest different aspirations such as become an astronaut, become master of evil, collect 15 perfect fish, etc. This one gives you about 8 or so choices of broad categories such as “Love,” “Fortune,” “Nature,” and so on and so forth. And within that category you pick, you choose a more specific option. For example, if I picked “Love,” it would either be to find a soulmate or be a “serial” dater. And then after that, you can pick 3 personality traits such as Athletic, Lazy, Bookworm, and so forth.
After creating a single female with a thing for money and socialization, I was ready to jump in! I moved her into a pre-built house (as I always do–I was never one to build houses unlike some of my friends) and got started. It was very different from the previous Sims. The build mode is completely different. There were slight things that made a big change, such as instead of turning with the mouse to rotate objects, you now use the right mouse button and such like that. After eventually learning all the tools and how to put what furniture I wanted in, I started to play.

Image source
The gameplay, at first, is different from the former games. It’s actually “harder” than the other ones. With Sims 3 and previous games, it was easy for me to advance my Sim and do whatever I wanted. In this game, they’ve brought elements of the first Sims back and made it more difficult to achieve things. I like this! It gives me more of a challenge which I enjoy. The big new thing about this game is that Sims now have moods that significantly affect the game. Before other things like relationships, jobs, and aspirations would create the “wants” for your Sims–and they still do to some degree. However, now, the mood of your Sim has a huge impact on what their “wants” are. I’ve found them to be slightly repetitive, but not too much that it makes it boring. The different moods (from Energized to Flirty to Bored to Inspired) affect how you do certain activities and how you perform at work and school. It’s fun that it makes an impact on the game. Yet another element to keep challenging you.
I’ve gone through one generation so far, had a kid, got married, and so forth. I’m really enjoying the game. Overall, this Sims game has the steepest learning curve. It’s not huge, but substantial compared to the previous game. It’s definitely more challenging and the Sims’ lives go by that faster because of the harder difficulty as you’re trying to advance their career or whatnot. I like that. Sometimes in previous games, I would get bored because it would be so easy to do well. Not anymore! They’ve taken out things like ghosts and toddlers, and at first I was upset, but it really hasn’t been that big of a deal so far.I’m probably most displeased with the lack of traditional career options. There used to be a core career selection such as Medical, Science, Athletics, Military, and so forth. They’ve taken these out (wrongly, in my opinion) to add in Comedian, Space Cowboy, and other random careers. Probably my biggest nitpick of the game so far.
Overall, I am liking the game, so Sims 4 gets a thumbs up from Hungry and Fit. I still have a lot to play and a lot to experience, but I believe that this new game is on the right track. As always, stay hungry and fit!

Coffee Almond Crunch Granola
*Please welcome back, Jamie, who brought you that delicious hummus recipe a few weeks ago (she even provided us with a bonus kitty pic–YES!!*
\\ Jamie’s passion for food and cooking began as a young girl, while watching her mother in the kitchen. Her curiosity has pushed her to learn how to make a lot of her own products from scratch instead of buying it at the market like hummus, granola, yogurt, pickles, and much more. Jamie is currently studying to become an Occupational Therapist and would love to incorporate cooking into her practice one day. //
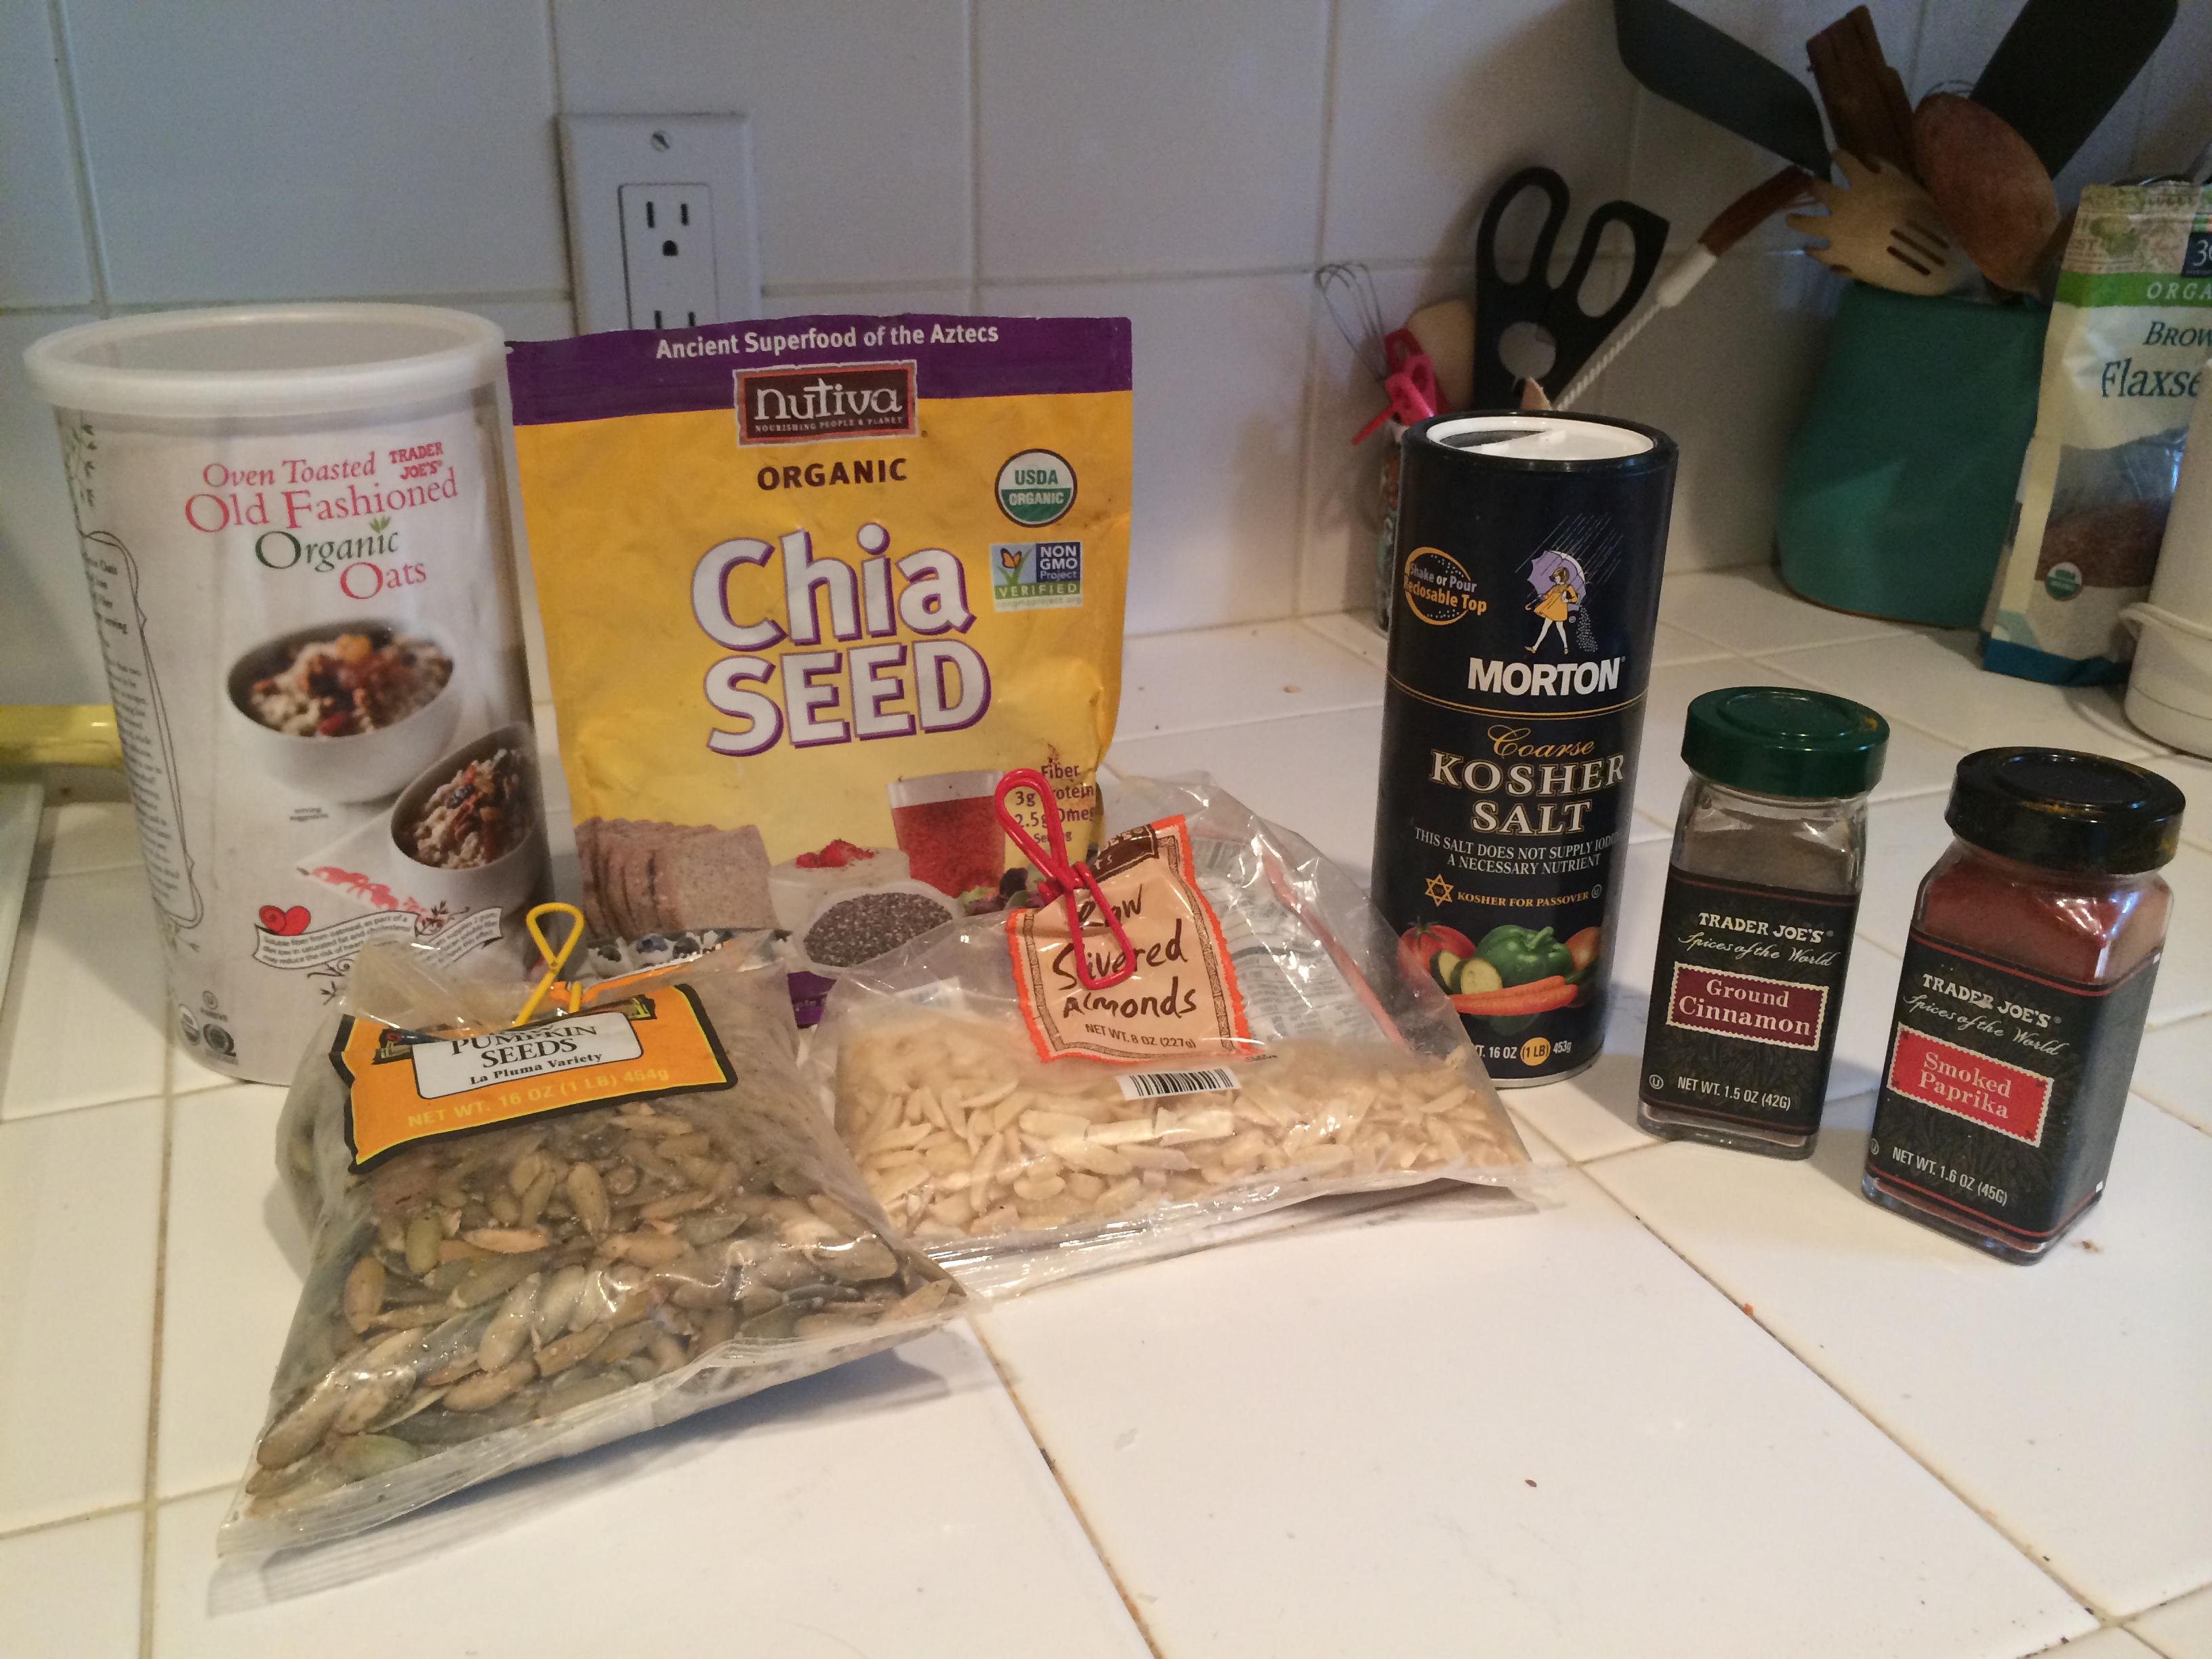
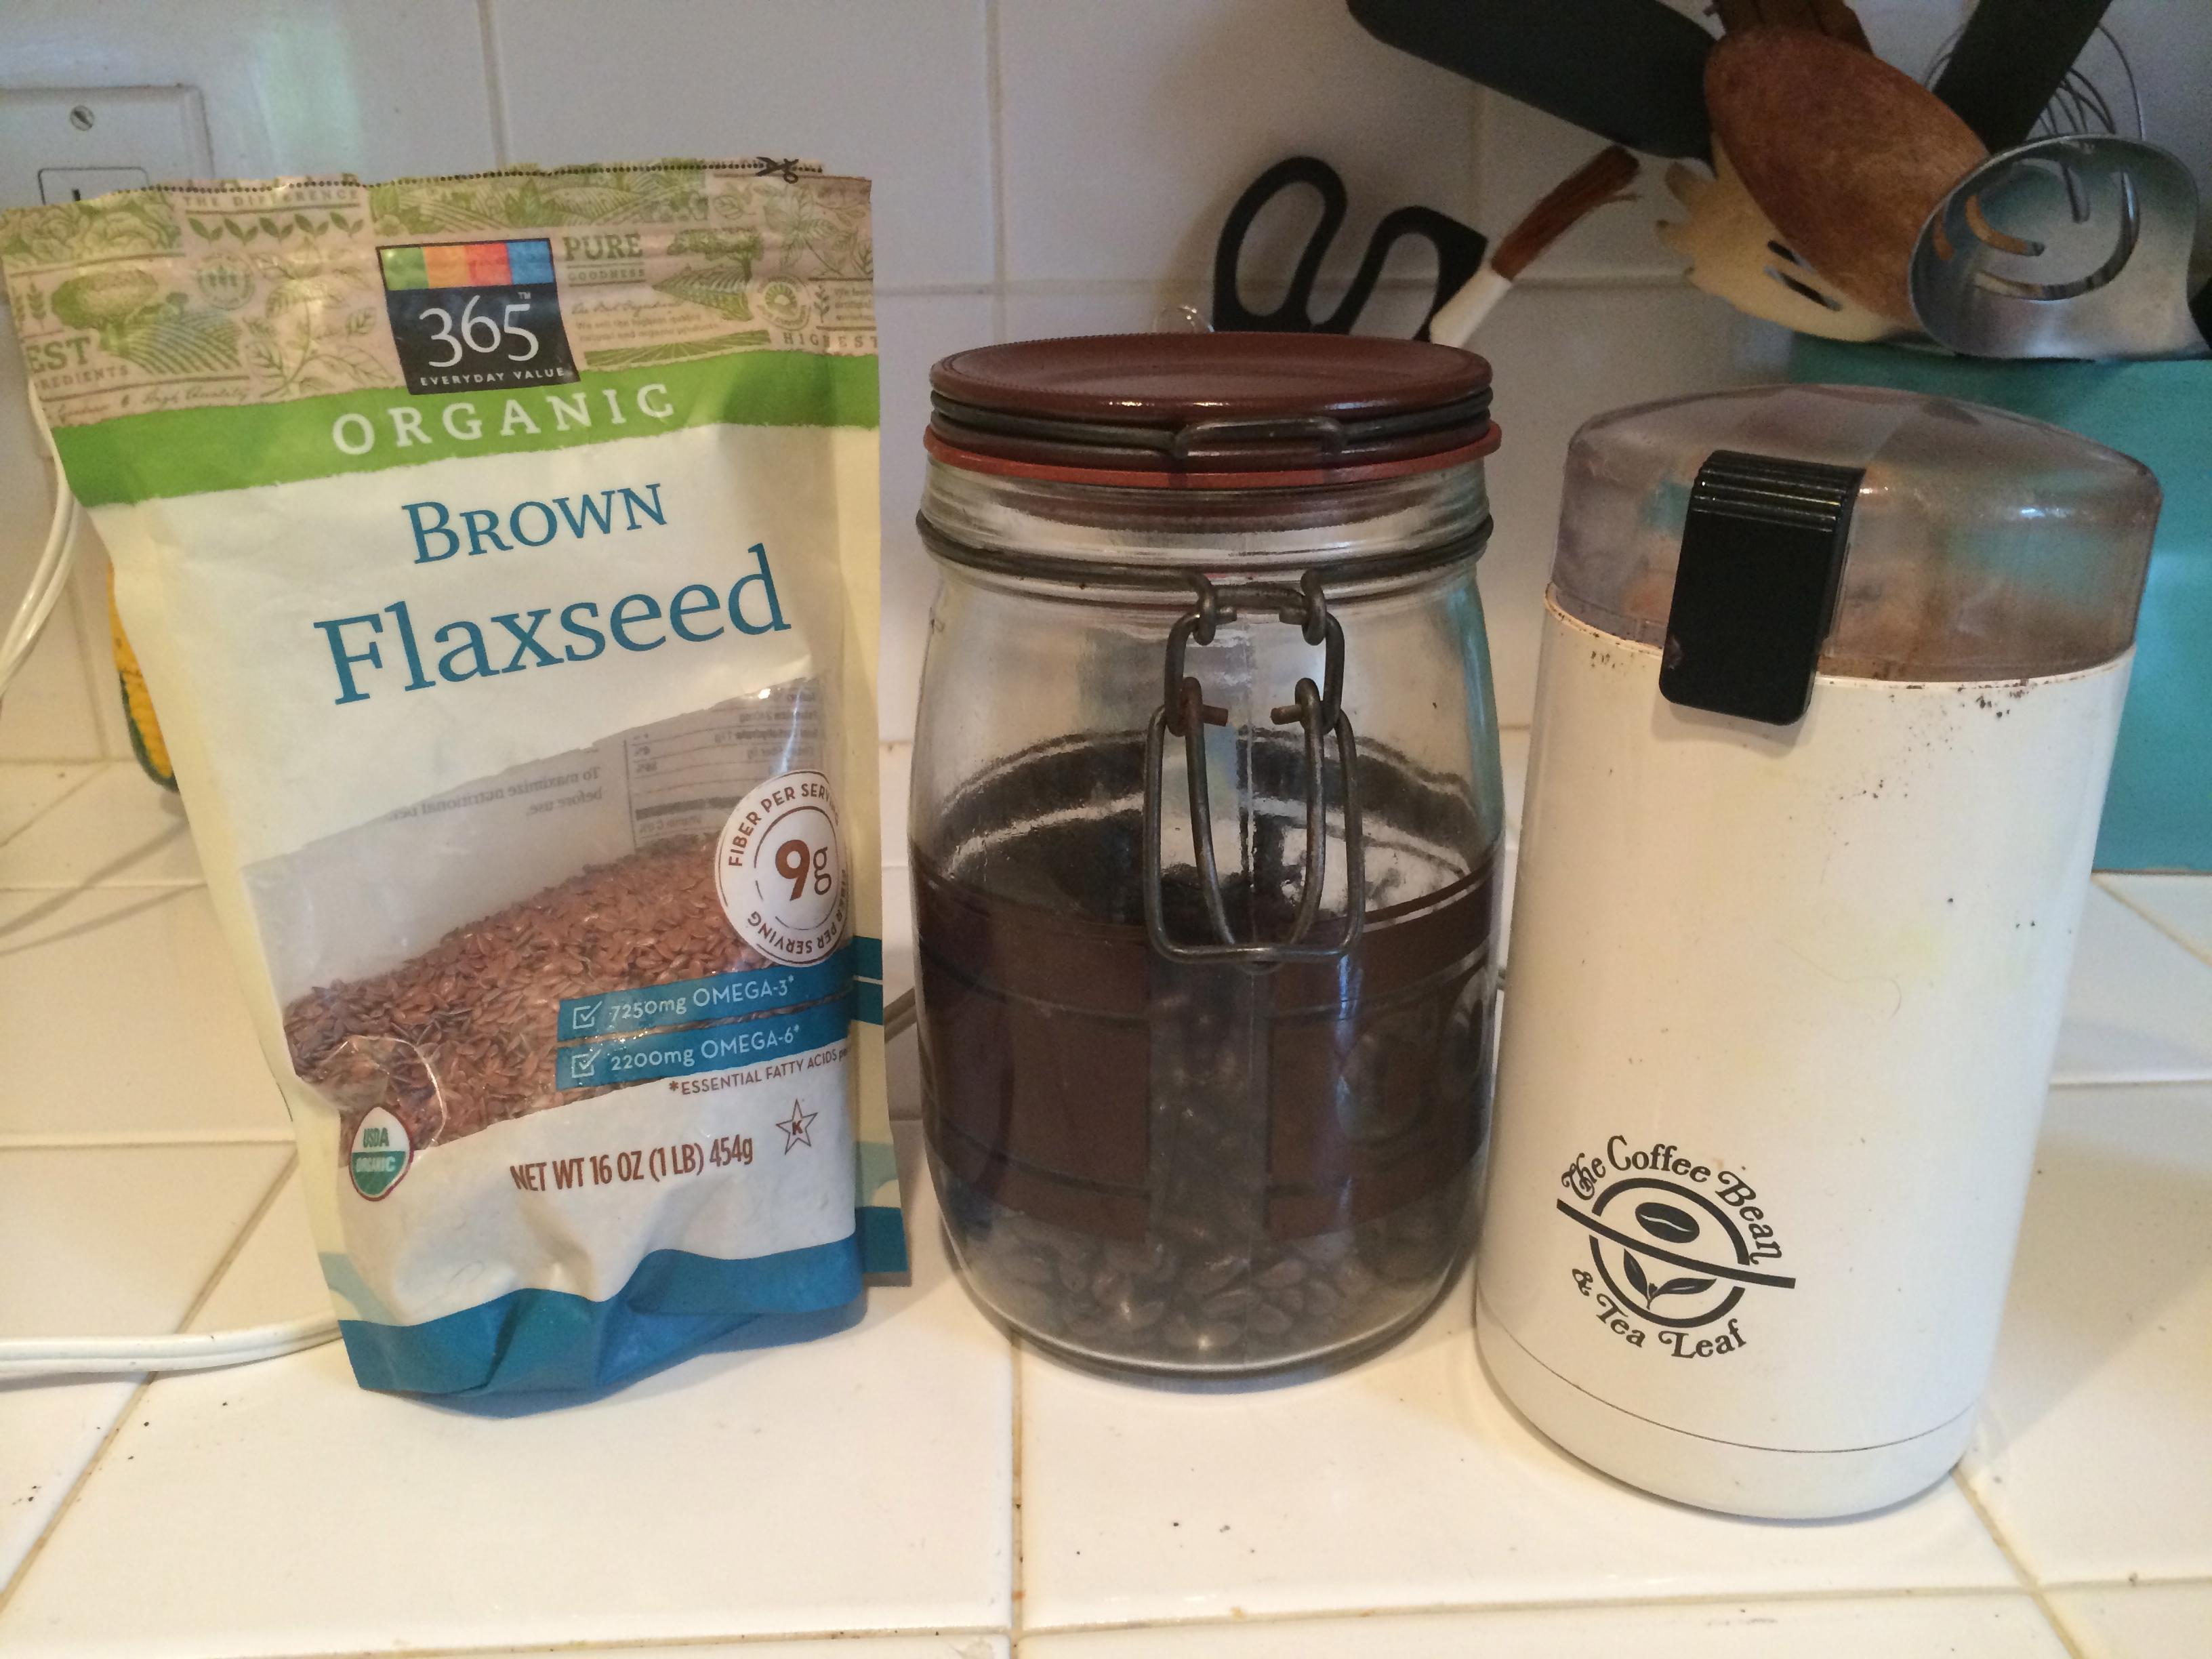
I love making granola because it’s fun and easy to experiment with spices, oils, and flavors and not to mention–delicious. For this batch, I used ground cinnamon, coffee, paprika, and salt to play with sweet and savory, but you can get creative and use whatever spices you love! I also like using whole flax seed that I grind up not only because it is chock full of fiber and antioxidants, but because it also acts as a binder so you get chunks of granola.
Ingredients:
- 3 cups rolled oats
- 1 tbsp chia seeds
- 1 tsp ground cinnamon
- 1 tsp salt
- 1 tsp paprika
- 2 tbsp whole flax seeds
- 2 tbsp coffee
- ¼ cup coconut oil/walnut oil, or whatever you have on hand
- 1/3 cup maple syrup or honey
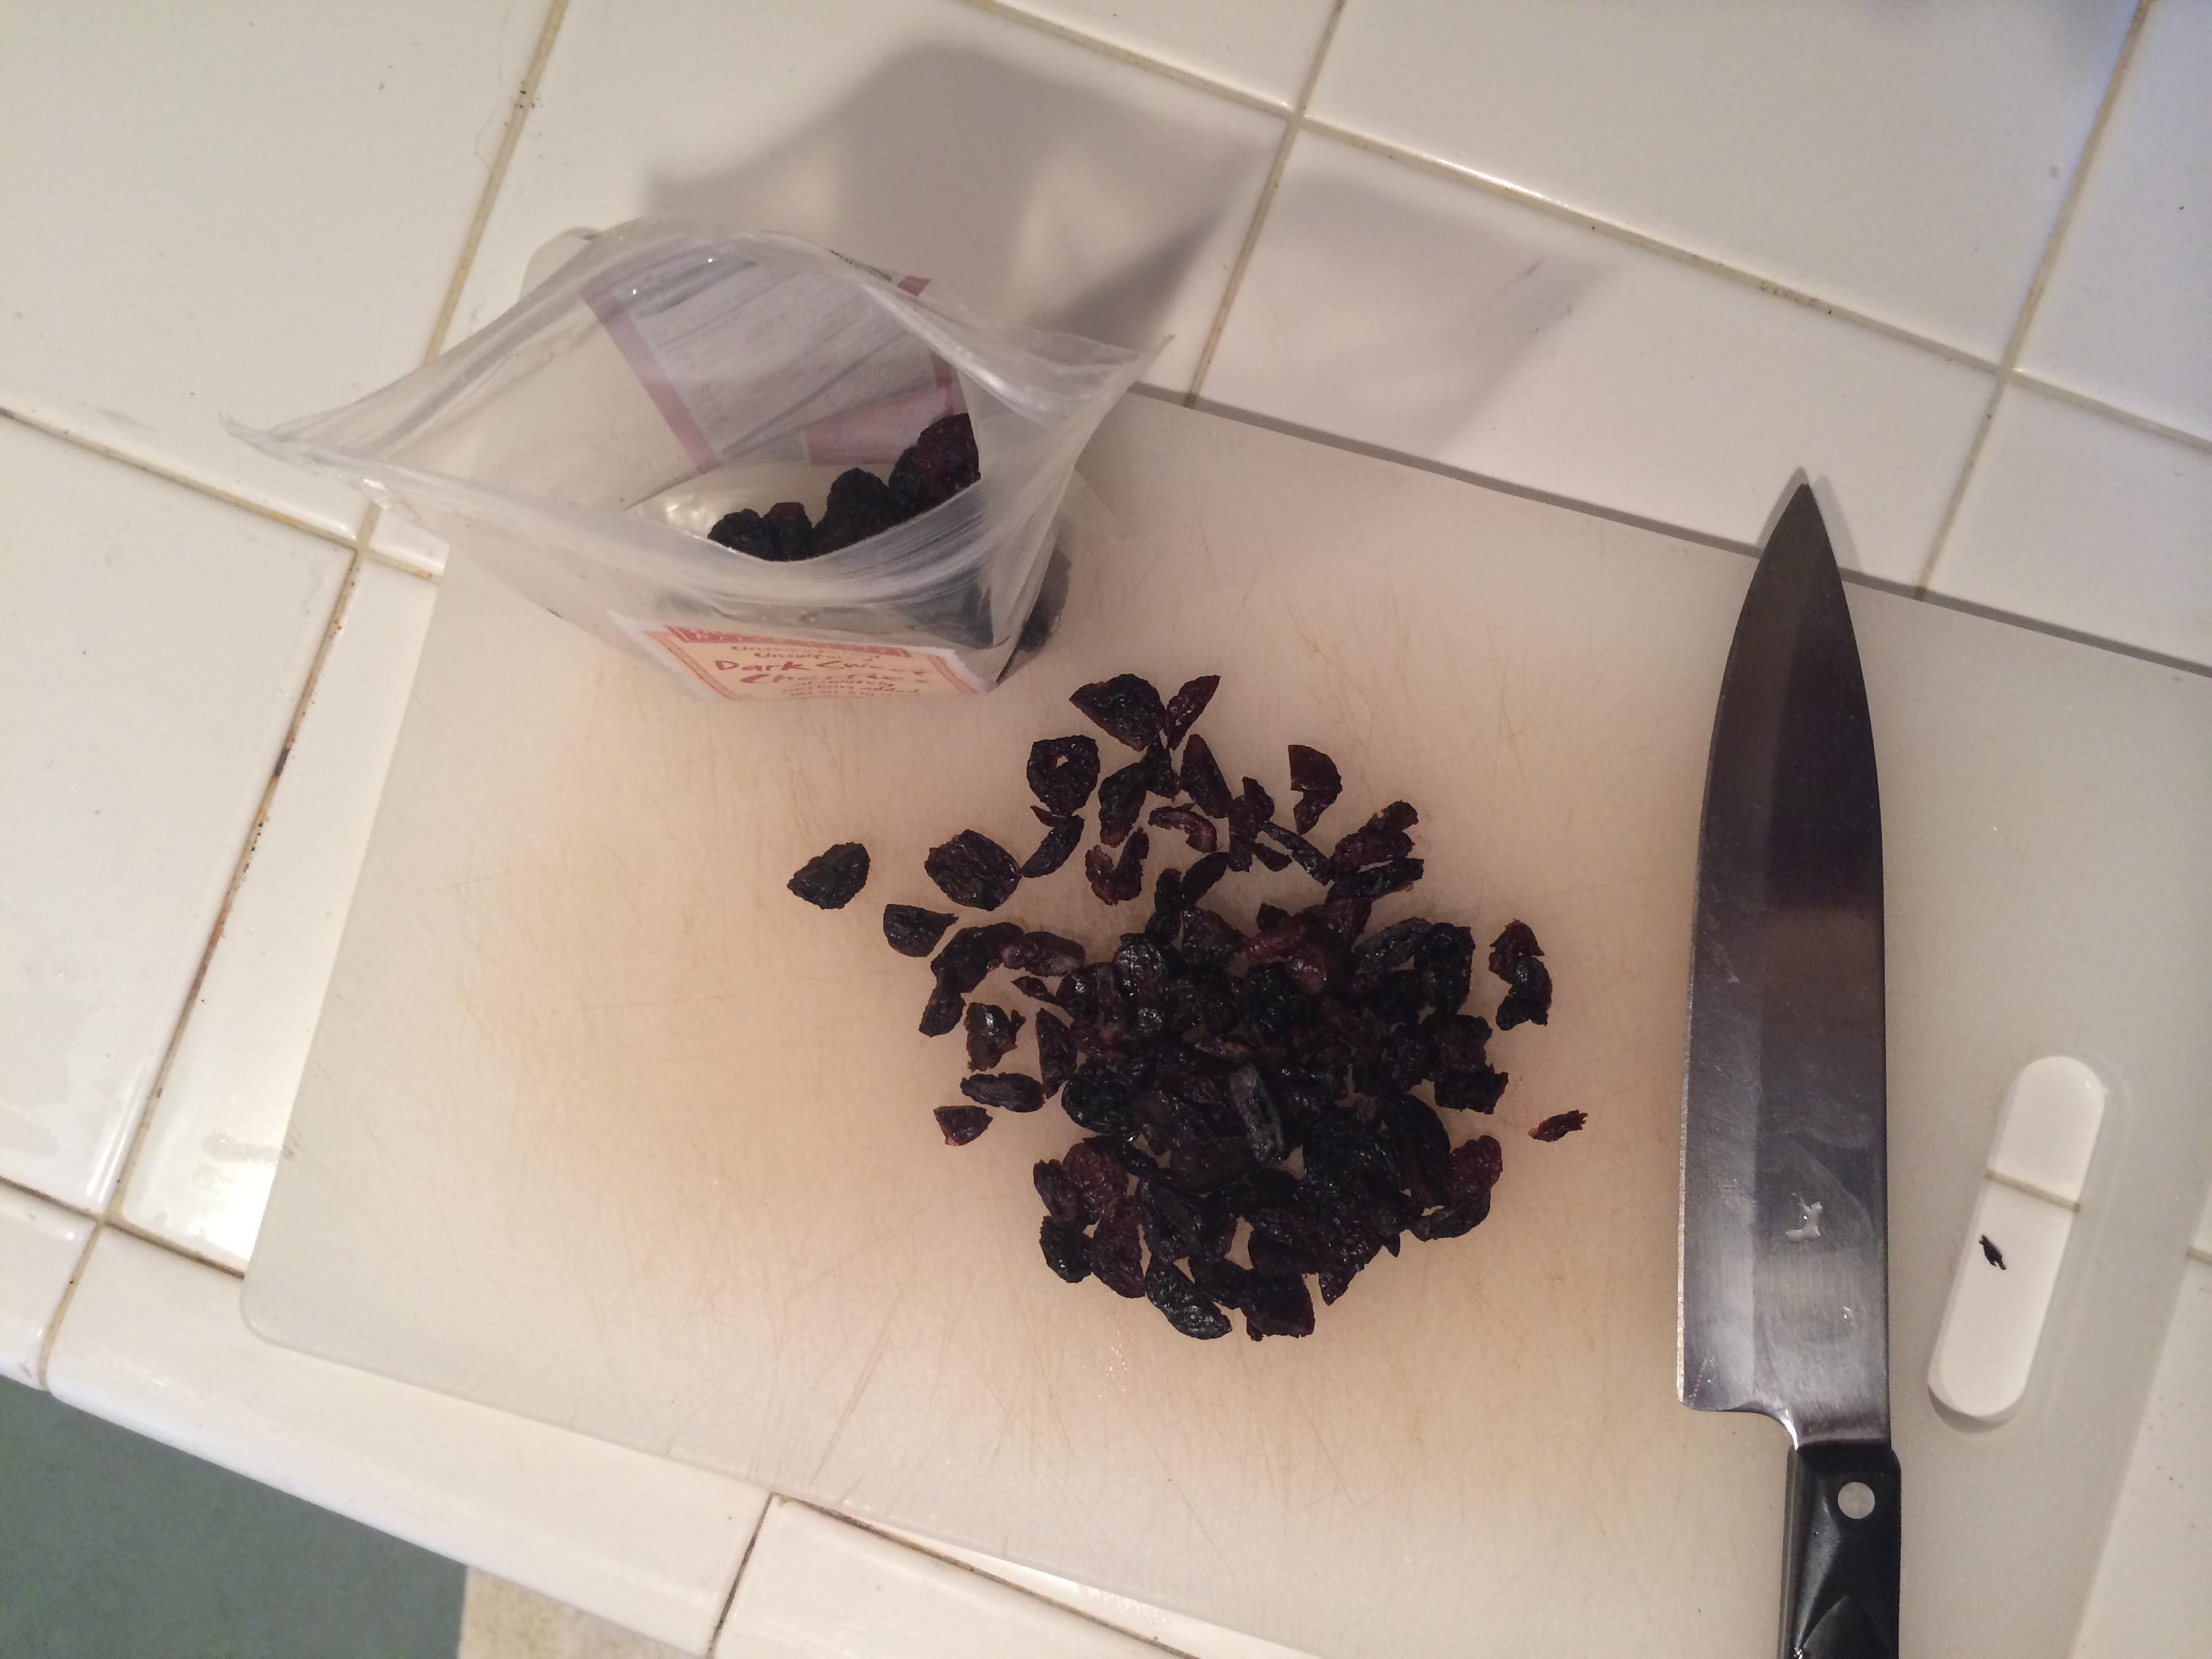
- ½ cup dried cherries or any dried fruit you like
- ½ cup almonds
- ¼ cup Pepitas
Directions:
- Add rolled oats, chia seeds, cinnamon, salt, and paprika to a medium bowl.
- Grind the whole flax seeds and coffee in a coffee grinder and add to oats and spices.
- Add coconut oil and walnut oil or whatever oil you prefer, maple syrup/honey, almonds, and pepitas.
- Mix well and spread evenly on baking sheet, pressing down on the granola mixture.
- Bake at 300 degrees for 15 minutes, stir, and continue baking for another 15 minutes or until golden brown.
- Add chopped cherries or any other dried fruit. Let cool and enjoy!
BONUS KITTY PIC

Help, I Need a New Workout!
Try It Thursday to the rescue! If you’re ever running out of workout ideas because you’re the kind of person that wants to stay in shape but doesn’t like the monotony of repeating the same exercise routines over and over, Hungry & Fit are here to help. As fitness professionals that have worked with individuals of varying levels, ages, and body types, we have experience innovating and creating new workout programs. Now, we are going to bring these to you… for free of course!
Last week Hungry presented his first Try It Thursday through his Instagram, Twitter, and Facebook. (We’re still working on YouTube, Bodyspace, etc.) Since it didn’t get much attention and he liked it so much, we’re going to provide you with the same challenge. However, every week it will change. It might be something you can do once a week, or something that will help you build a workout routine for a whole week. It’s not necessarily a full program for someone with strict goals but it can help everyone try something new and build some new strengths and skills.
We would love to see you perform, capture, and share your Try It Thursday workouts! Use whatever social media you have or write about it in the comment section of the website. Hungry showed his last week and he really wants to see all of yours! Why? Because it’s fun, because it shows you’re trying, and because we love to see what you’re up to. Keep your eyes posted to all of our social media outlets for the Try It Thursday workouts. They will be coming to you on Thursdays for you perform any time throughout the week. Here is a recap of last week’s Try It Thursday.
Perform a superset of two exercises, which means perform the two exercises back to back. Then rest for two minutes, and continue to perform the two exercises until you have either completed six full sets of each or have performed them for 20 minutes. Remember to warm up before you start this workout for injury prevention. Do not rest in between the first and second exercises, if possible, in order to keep your heart rate elevated. What makes this Try It so much fun? YOU get to choose the exercises!
a. Something you are really good at doing (Reps/duration and weight depend on the exercise!)
b. Something you are really bad at doing (Reps/duration and weight still depend on the exercise…)
It’s that simple. The idea here is that you are stimulating yourself both physically and mentally. Dominating the exercise you already are skilled at will help boost your confidence going into the exercise that needs improvement. Even after you possible lose some of that confidence during the challenging exercise, you will be excited to be going back to something you are so good at! It’s a whole bunch of trickery, my favorite way of training clients and working with athletes. Here is what I did.
a. Swim butterfly (against a rip current) in the ocean, breathing every five strokes (1:05 100 pace until fatigued)
b. Practice handstands on the beach (10-12 attempts)
This was a really fun one because I really need to work on handstands and I love the beach. I also capitalized on the rip currents from Hurricane Marie to use the ocean like an Endless Pool and stay in one spot. That way I can come right back out and do my handstands in the same place.

I hope that everyone who is looking for a new workout keeps an eye on Hungry & Fit all over social media. If you subscribe/follow/like us you will be able to see these every week. Even if you have a serious regiment, it doesn’t hurt to have some extra fun and if you are completely lost and just want to start working out, then these are going to be some really fun free exercises for you!
Use Try It Thursday to stay Hungry & Fit!

The Best Meatloaf Recipe Ever
Protein! Get your protein here! But, seriously–this meatloaf is chock full of protein and damn good flavor. My mum found a recipe for meatloaf and changed it to make her own and I was lucky enough to be nearby–it turned out to be the best meatloaf recipe ever. I may be a vegetarian, but the rest of my family really enjoyed it. Hungry even said it was one of the best he’s ever had–better than restaurant quality. That’s a rare compliment! It’s an incredibly simple recipe that even has vegetables! This is a great back-to-school recipe that can feed the whole family twice over. You know protein and flavor are important to us and that’s why this recipe is a hit.
- 1 cup fine fresh bread crumbs
- 1/3 cup 1% milk
- 1 medium onion
- 3 garlic cloves
- 1 medium celery
- 2 tbsp butter
- 2 tbsp Worcestershire sauce
- 1 tbsp cider vinegar
- 1/4 tsp allspice
- 1 1/2 lbs ground beef (75%)
- 1/2 lb pork (80%)
- 2 eggs
- 1/3 cup parsley
- Meat thermometer
- Preheat the oven to 350 degrees F
- Soak your bread crumbs in the milk in a large bowl
- Chop onion, carrot, celery, and garlic
- Cook onion, carrot, celery, and garlic in butter in a large pan over medium heat and stir for 5 minutes
- Cover the pan and reduce to low heat and simply cook until carrot is tender
- Remove from the heat and stir in the Worcestershire sauce, allspice, cider vinegar, salt, and some pepper
- Add veggies to the bread mixture
- Pack mixture into an oval loaf and then put into a 13 by 9 inch baking dish or pan
- Bake until center of meatloaf reaches 155 degrees F which will take between 1 hour and 1 hour and 15 minutes
- Let stand for a bit before serving and then DIVE IN
BONUS PUPPY PIC